Let's program the Arduino with Javascript🤯
Have you ever programmed an Arduino? Did you know that Arduino can be programmed with JavaScript?😏
Requirements
- Arduino UNO microcontroller,
- LED,
- 220-ohm resistor,
- Arduino IDE installed,
- NodeJS installed (I recommend the latest LTS version),
- Visual Studio Code (or another code editor).
We must first assemble the circuit we are going to work with.
A circuit similar to this is created in TinkerCad.
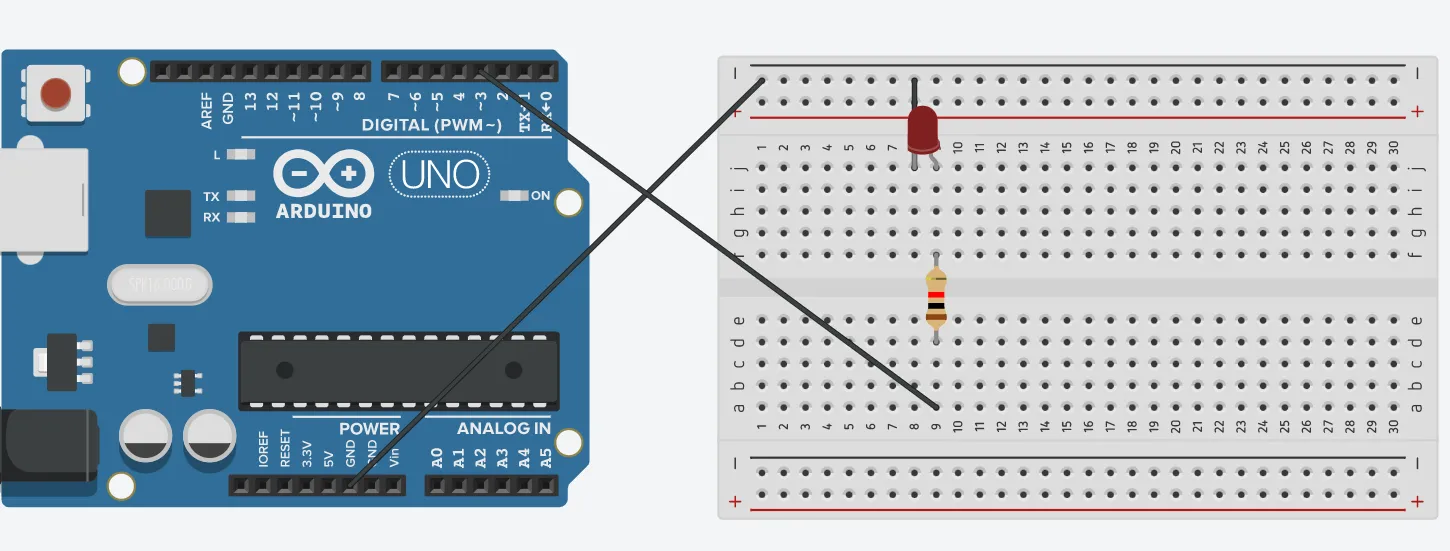
Once we have the circuit assembled we need to prepare our Arduino for programming with JavaScript not yet completely.
We must first install the Firmata library on it.
Navigate to File> Examples> Firmata> StandardFirmataPlus and upload the file that opens to our Arduino.
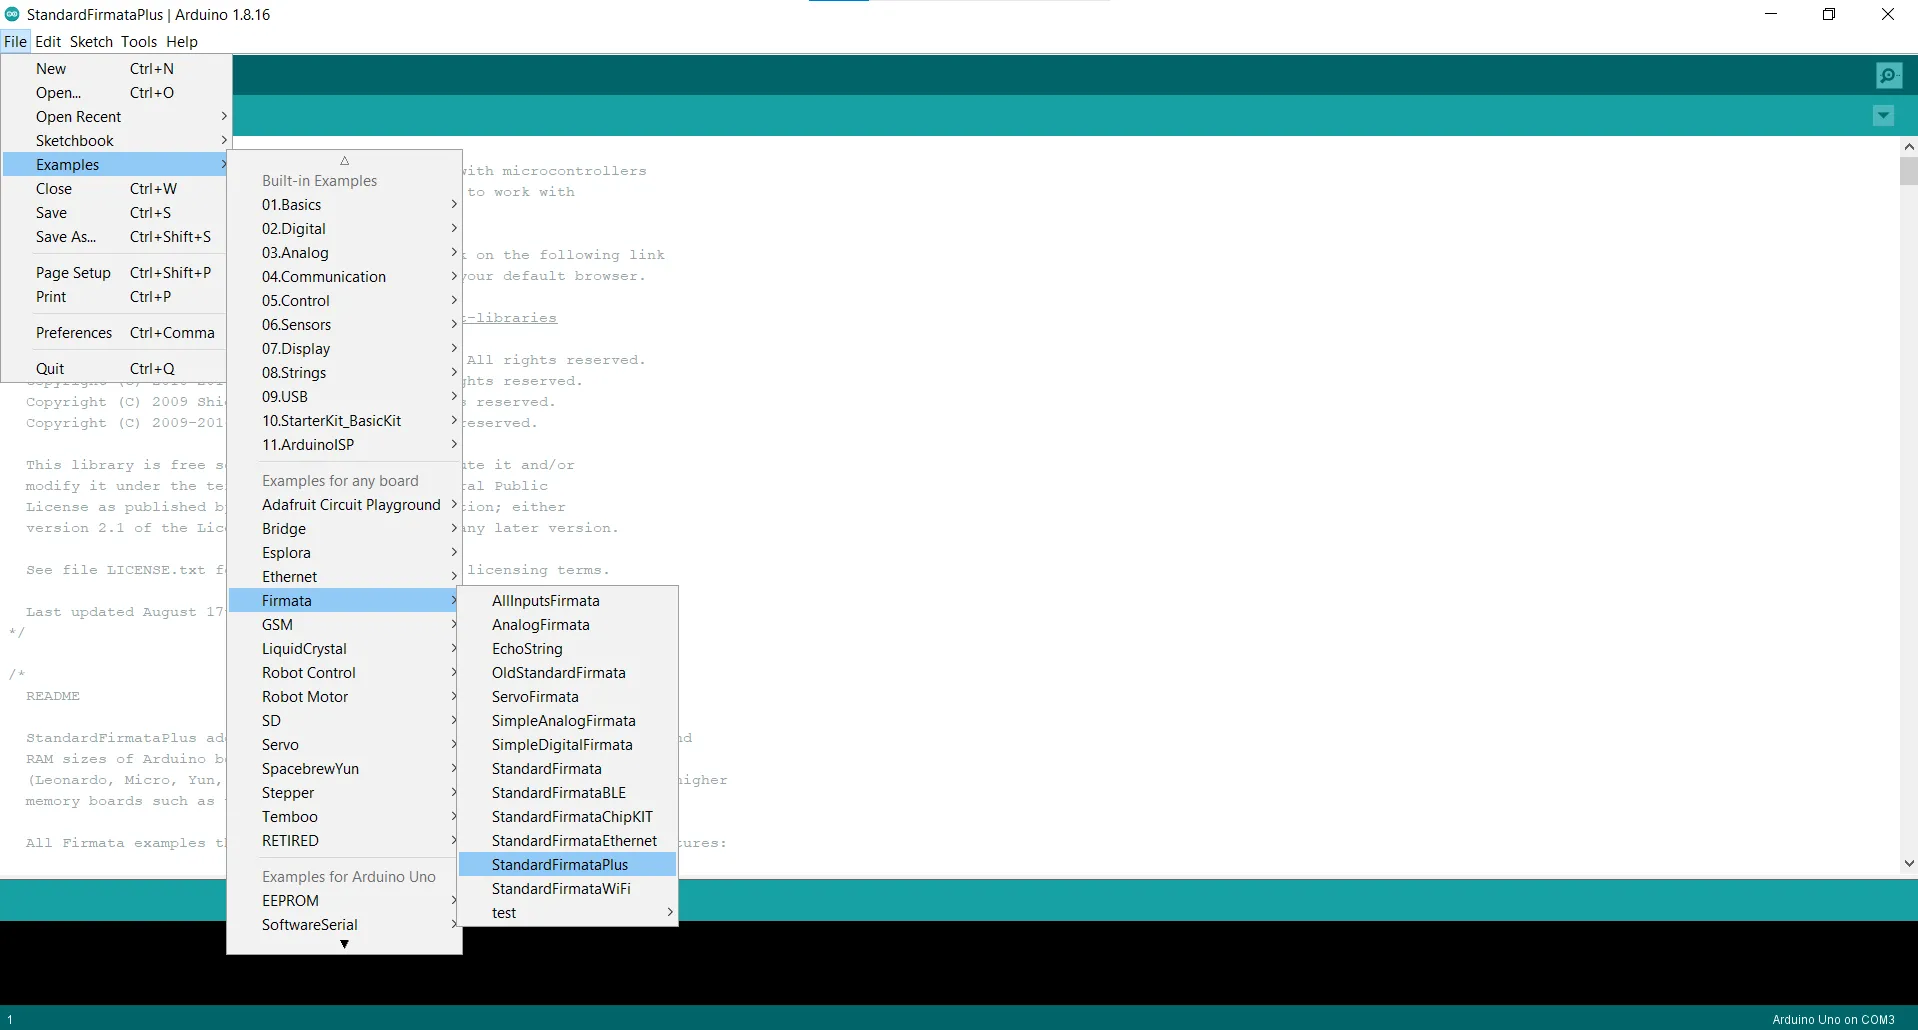
Upload the code to the Arduino board by pressing the Upload.
After a successful upload, we need to install some pre-required tools.
Now is the time to make a directory where we will write our code for Arduino.
Since I’m using a Windows computer, I had to do a couple of things before I could start programming Arduino with JavaScript.
In the console with administrative privileges, enter two commands to install two more programs.
npm --add-python-to-path install --global --production windows-build-toolsand install the node-gyp JavaScript library with the command
npm install -g node-gypFor your operating system, check what you need to install before starting at this link.
After installing everything you need, we can start working.
We will use the johnny-five library to program the Arduino, which is one of the better libraries for programming microcontrollers. It supports Arduino, Raspberry Pi and more … A list of all is available at this link.
The library allows us to program many components for the Arduino. The advantage I see is that it makes many tasks easier for us compared to C ++.
Code for our simple circuit.
const { Board, Led } = require("johnny-five");const board = new Board({ port: "COM3", // Check if is your Arduino on this port (this you can make in Arduino IDE)});
board.on("ready", () => { const led = new Led(3); led.blink(500);});Now, all we have to do is run the program on our Arduino. To do this, type in the command line:
node main.js # In case if our file is named main.jsNow it’s your turn to start creating a variety of circuits with JavaScript and the Arduino microcontroller.
Did you find this post helpful?
A little support goes a long way in helping me create more free, in-depth content like this.
This post was prepared with the assistance of AI tools and has been editorially reviewed before publication.